Stashbusters update and other stuff
Thanks to my sweet, patient husband, I got a bunch of sewing done this weekend. I made a couple camera straps - one for me and one for my sis-in-law.
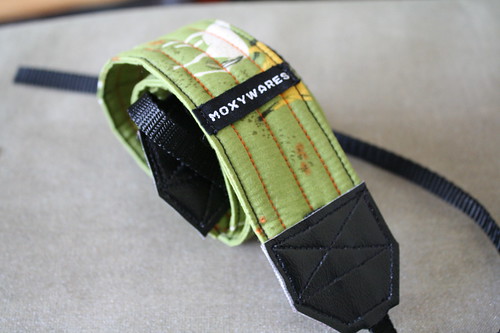
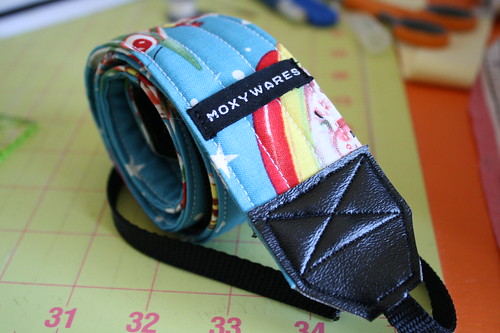
These come together pretty easy - once I figured out how to pin the vinyl so it doesn’t slide all over the place. I think I’ll actually be able to get some of them into my etsy shop before 2011!
I also set to work following Elizabeth’s crazy nine patch tutorial. I got 18 blocks sewn, only have 27 more to go! I’m enlarging her pattern a little, because it’s for my sister, and she’s no baby! ha haa…I kid because she’s older :) Anyway, he’s a preliminary photo.
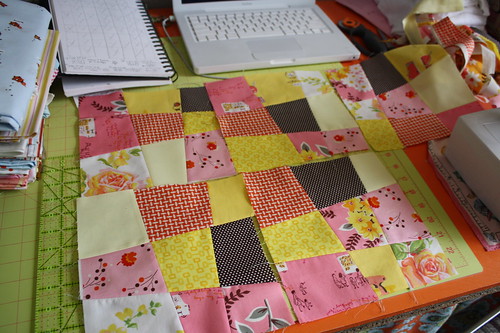
Because you just need a 9.5″ square of each fabric, and I needed 45 squares, I added in a few different fabrics in some of the blocks. I hope it all comes together. I probably have 20 different fabrics in the whole quilt. It might be a little nutty. My plan is to throw all 45 crazy blocks in a paper bag a la Denyse Schmidt and let the chips fall where they may.
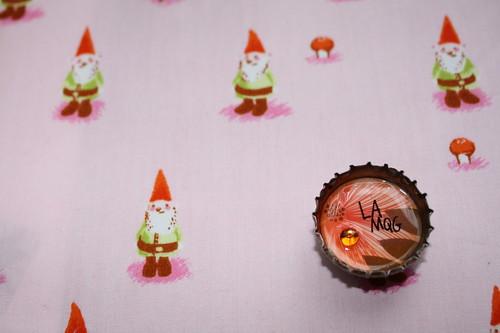
Under the ‘other stuff’ category, I had a ball at last night’s LA Modern Quilt Guild meeting. I learned a whole bunch from Alicia, the Batty Lady. Got a gorgeous little magnet (below) from Jamie and Courtney, and got to talk to new friends Emily, Jane and Jeanie. I’m really looking forward to this Saturday’s sew!
Stashbusters, Day 3
I started Wondermommy’s stash buster on Feb. 1. So tell me WHY OH WHY have I spent the last hour looking at fabric online, placing and then removing it from shopping carts? Why am I watching 20 items in my eBay, 3 of which are munki munki prints? Do vintage sheets count as fabric? Because I’m also watching some of those on eBay.
half yard bundle
Good news? I’ve made no purchases. Bad news, there are some fabrics I’d really like to buy today. Like Kauffman’s Monaluna Mingle squares in aqua and red (like the bundle seen here from sewdeerlyloved’s etsy shop) or Lizzy House’s Red Letter Day ugly duckling? Which is adorable and has been available for some time…does that mean that I won’t be able to find it once the stash busters is over?
More good news, I have a big sewing day coming up - my first weekend sew with the LA Modern Quilt Guild. 11 am to 7 pm! Woo hoo! That is some serious sewing time! I should be able to do some serious busting.
Anyone else struggling with the shopping? My craft table is such a mess of un-binned fabric that I can’t even sew. It’s an embarrassment of riches around here.
GET TO WORK, BLABBY!
blabbery flickr quilting patterns sewing tutorials: hexagons
by Blabby
51 comments
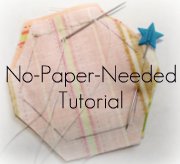
Hand-Sewn Hexagon Tutorial
Here’s my little tutorial for hand-sewing hexagons together without using paper templates inside the hexagon.
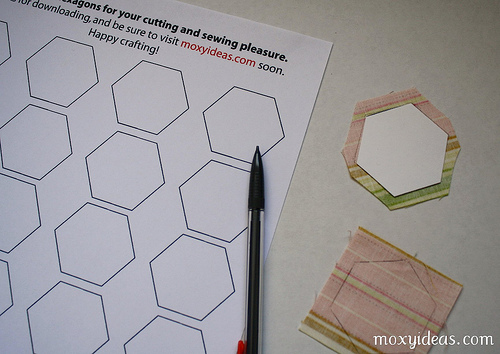
First, download the hexagon template you want to use. Cut out your shape - you really only need one or two. (I made the template sheets for people who need lots for English paper-piecing). You can pre-cut your fabric into squares a little larger than your template (at least a 1/2″ on all sides), or just keep your fabric whole. Trace your shape. A lot!
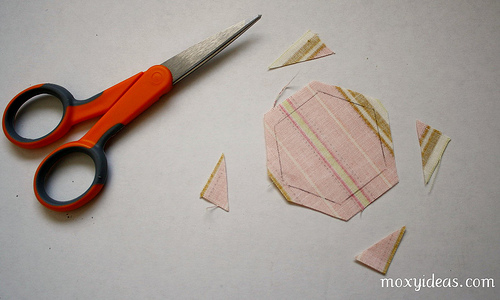
Cut out your hexagons, leaving a good 1/4″ seam allowance all the way around.
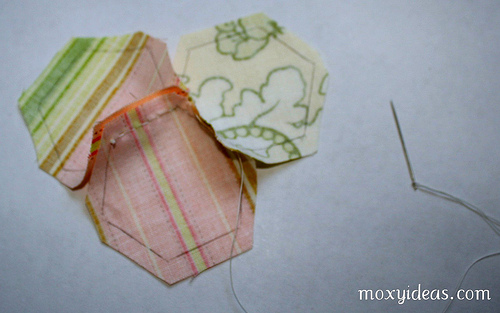
Place two trimmed hexagons right sides together and stick pins through two corners. Don’t worry about your outer edges lining up, just get your pencil lines to match. Two pins - one at each end of one side of the hexes - is the easiest way to get a good match.
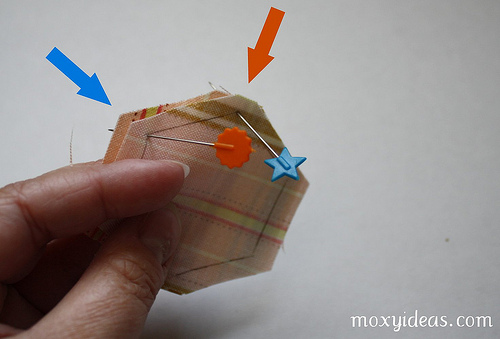
Stick your pins in along the lines away from where you’re going to sew so they’re out of your way. Thread your needle, and put a knot in one end. Use the knot to anchor one more corner together - this will be your starting point. I like to start and stop with a tiny back stitch at each corner when sewing these hexes together, just to make the intersections stronger.
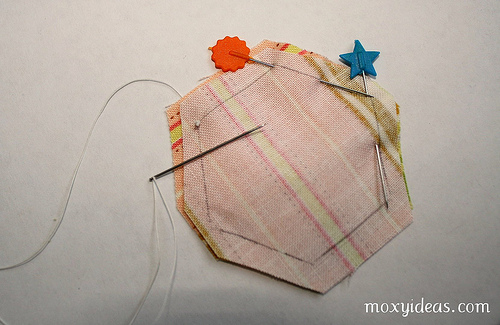
Pushing your needle up and down in a running stitch, sew right along your pencil lines.
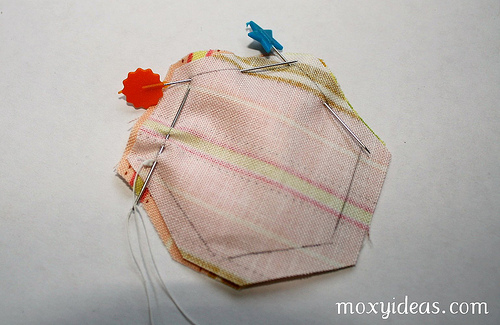
As you get to the end of your side, remove the pin to get it out of your way. Sew your running stitch all the way to the next corner. Once there, sew a small back stitch to secure the corner. Be careful not to pull your thread tight - it will gather your hexes. You’ll have to continually loosen the fabric back to a nice flat seam.
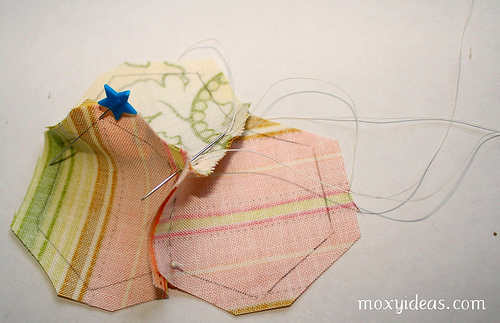
Now you’re ready for a third hexagon. You can add it anywhere, but for this tutorial, I just kept moving to the right. Open your first two hexes and line your third hex up right sides together with your second hex. Use a pin in the corner to keep them lined up.
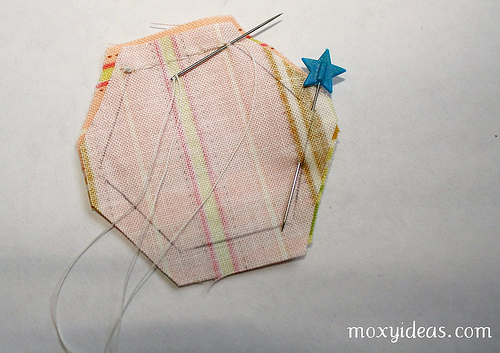
After a quick back stitch through the second and third hex, to both join them and secure the intersection, continue your running stitch to the next corner.

Now you’re at the far right side, and you need to get back to sew hexes one and three together. You can do a back stitch and tie a small knot and cut your thread, or you can do a back stitch and sew a few stitches to run the thread back to the center. I do the latter…it may be laziness, but I try to see how far I can get without ever cutting the thread.
Use the same method of lining up hex one and three, right sides together, and securing the outside corners with a pin. Sew with a running stitch toward your pin.
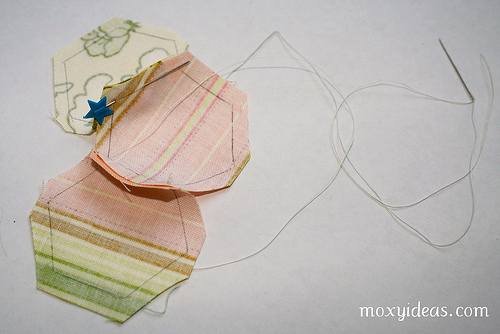
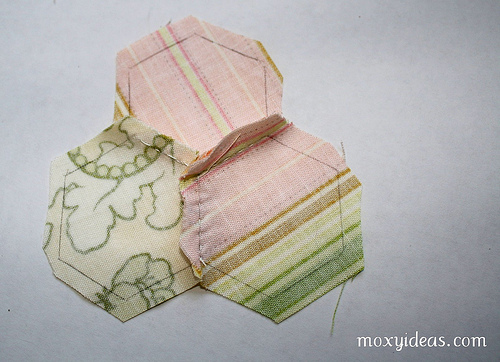
I’ve stopped at three here, but you can just keep adding more and more around, choosing where to place the next one based on where your thread left off. Here’s the back - I’ve finger pressed the seams.
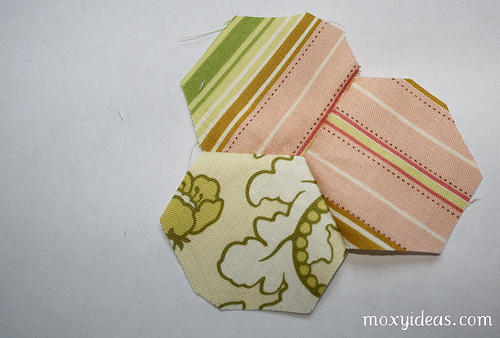
Here’s the front. Once I’ve got all the hexagons I want, I use spray starch to flatten out the seams. Eventually, I’ll also use spray starch to turn the outside edges under, and I applique my hexes down to a foundation. I guess you could just keep going and going until you make a whole quilt, but that is a little ambitious for me.
So that’s it! I hope it helps someone. Sewing these goes super fast - it took ten times as long to write this tutorial as it did to sew those hexes together. I hope you’ll link back to me with pictures of your completed projects!