addictions fabric flickr heather bailey recycle sewing: alicia paulson jane market bag linen pattern tote
by Blabby
leave a comment
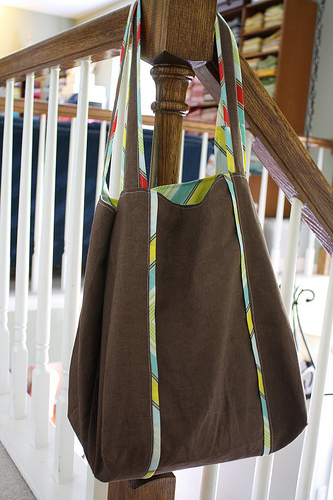
Jane Market Bag
I got to do a little sewing recently. I’ve been dragging around my Purl Soho tote bag for months and months and it is sorely in need of a wash, but I hate all my other bags. So I thought I’d make something similar, but less NPR-free-tote. (Not that I don’t totally love a free tote).
So, anywho, I started checking around the interwebs for some inspiration and found about a zillion people had made this lovley Jane Market Bag. As evidenced by the very numerous search results on flickr here and the fact that it has it’s own group here. I should note that this pattern is actually supposed to be used as a fun grocery bag. Most of the changes I made (that I’m about to talk about) came about because I wanted to turn it into more of a big catch-all purse.
I bought the pattern for the bargain price of $6. It took me longer to pick out some fabrics than to do the cutting for this VERY easy and user friendly pattern. (Kudos to Alicia at rosylittlethings.com for such an easy to use pattern.) Recommended for beginning sewists. (sewers? I always think that reads like sewers where rats live…not sowers.)
So first - here was my initial fabric selection:
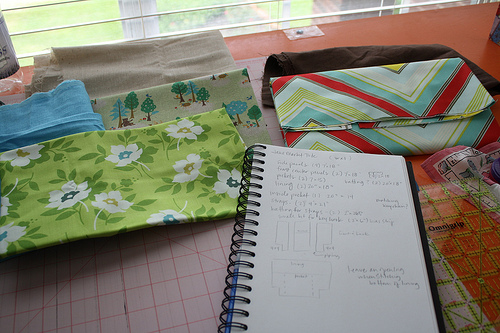
I really needed a neutral bag that I could carry anytime. So that eliminated most of my prints for the outside. I love linen, and although I’m not sure it’s really sturdy enough for a bag, I went with it. Sadly, I didn’t have enough of this brown linen to do a front and back pocket, so I just did a front pocket.
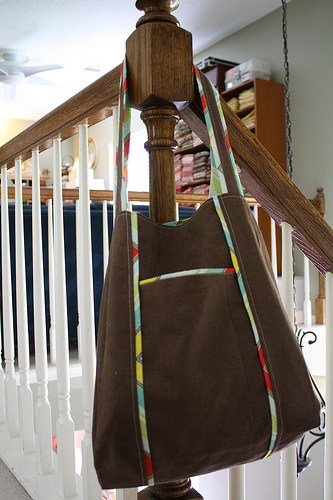
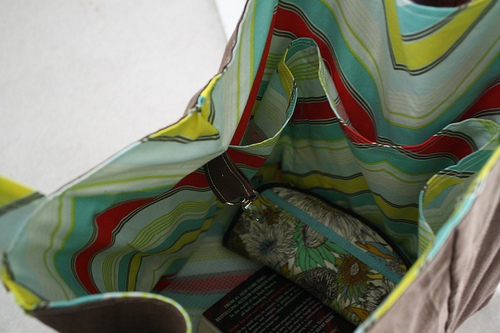
I deviated from the pattern a little by adding some piping strips to the front, back and handles. I also added pockets inside and a little key hook inside so I wouldn’t have to dig around for my forever-missing keys.
Front:
Inside:
Back:
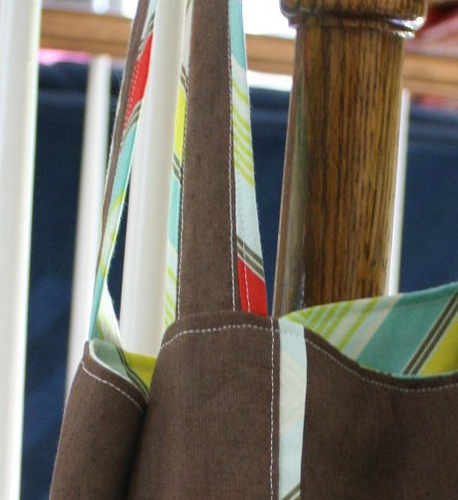
I really liked the piping, but it was a little too fat. I used a one inch strip, folded in half and sewn into the seams between the panels on the front and back. I should have just done a half inch. So it looked more like this piping (the super skinning piping on the left and right of the pocket):
For the straps, the pattern calls for 4″ x something (21″ I think?) strips. But that seemed like it would be too short for me (I measured my Kroger .99 cent grocery bags as a baseline because they never fall off my shoulder), so I went with 4″x 26.5″. But to get the print on the edges that I wanted, I did 1″ of brown and 3″ of pop garden - sewed them together along the long edge, and then closed the loop by sewing the other long edge of brown to the long edge of pop garden. Make sense? It gave me a tube - inside out. I used my crochet hook to flip it right side out, and pressed it centering the brown linen. Then I top stitched it inside and outside the brown.
Finally, instead of sewing the straps to the outside of the bag like in the pattern, I sewed them in at the same time that I sewed the lining to the outside of the bag. I’m not spatially smart enough to explain how this works, but you sew them in before you pull everything out through the bottom hole. You can see a great video of this ‘birthing’ method here: birth of a bag video by sugar sugar bags. She’s got the straps sewn inside also.
I’ve been carrying my new bag around for a few days now, and overall, I like it a lot. I’m planning a 2nd one, and next time, I’ll sew a bottom seam at the bottom of all pockets so my cell phone doesn’t slide down UNDERNEATH the bag. I just hate that. Also, I may consider interfacing. I was too lazy to put it in this time, and the pattern certainly doesn’t call for it. But even cotton batting would make this bag a lot more stable.
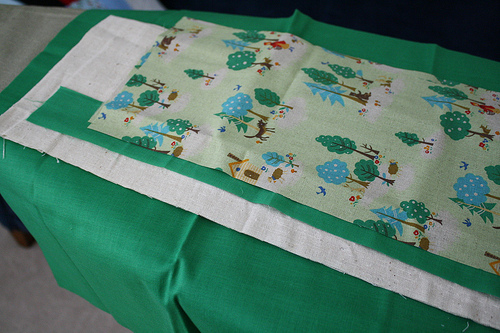
Here’s the fabric selection for the 2nd one - natural linen body, green red riding hood fabric for the pockets, green solid for the inside and piping. Should be cute!
sew deer pt. 2
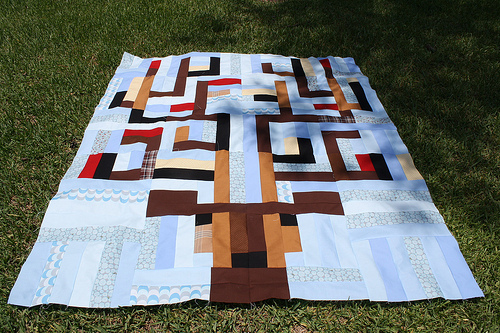
Well, I got this quilt all sandwiched and half quilted before I realized the bottom was bunching up. Such a bummer. That’s what I get for using discount basting spray that’s at least 2 years old. I spent two hours with a seam ripper removing half of the stippling I’ve done, and I just don’t feel like taking a picture of it. So instead, I’ll just share my finished quilt top before it was marred with a zillion needle holes.
I’d love to be doing more sewing. Let’s hope that now that school has started, there will be more time. Hope everyone had a great summer!