Hexagons, revisited again.
First I started out touting the miracle of paper piecing hexagons. Then I quickly figured out that basting in the little papers was double the work - for me, anyway. Many people swear by it. So I made this handy tutorial for hand-piecing with no paper. I still think this method is the best for small hexagons. Then I found this tutorial for bigger hexagons, machine-pieced together! And today, another awesome tutorial - this one video - by fellow LA Modern Quilt Guild member, Liz Harvatine. She’s also got a pdf of hex templates - bigger hexes than my pdf templates. And don’t you love the solids she used? Awesome.
So, there are no excuses now. Make a hexagon quilt already!
blabbery flickr quilting patterns sewing tutorials: hexagons
by Blabby
51 comments
Hand-Sewn Hexagon Tutorial
Here’s my little tutorial for hand-sewing hexagons together without using paper templates inside the hexagon.
First, download the hexagon template you want to use. Cut out your shape - you really only need one or two. (I made the template sheets for people who need lots for English paper-piecing). You can pre-cut your fabric into squares a little larger than your template (at least a 1/2″ on all sides), or just keep your fabric whole. Trace your shape. A lot!
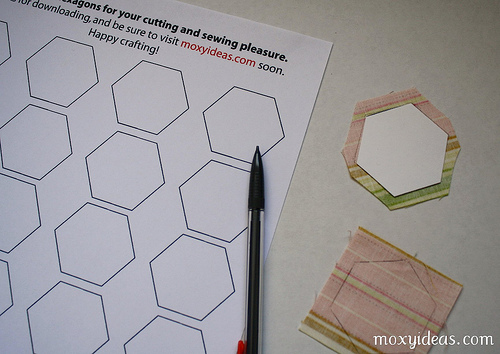
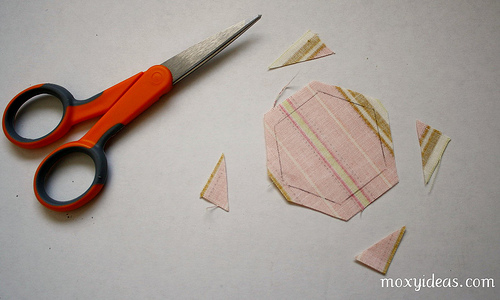
Cut out your hexagons, leaving a good 1/4″ seam allowance all the way around.
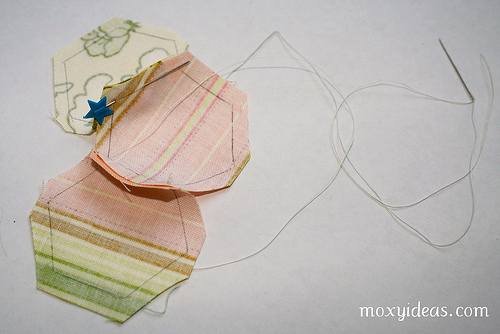
Place two trimmed hexagons right sides together and stick pins through two corners. Don’t worry about your outer edges lining up, just get your pencil lines to match. Two pins - one at each end of one side of the hexes - is the easiest way to get a good match.
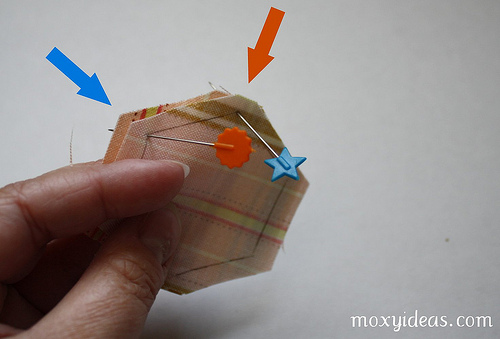
Stick your pins in along the lines away from where you’re going to sew so they’re out of your way. Thread your needle, and put a knot in one end. Use the knot to anchor one more corner together - this will be your starting point. I like to start and stop with a tiny back stitch at each corner when sewing these hexes together, just to make the intersections stronger.
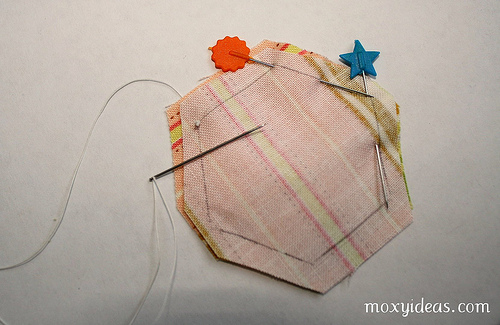
Pushing your needle up and down in a running stitch, sew right along your pencil lines.
As you get to the end of your side, remove the pin to get it out of your way. Sew your running stitch all the way to the next corner. Once there, sew a small back stitch to secure the corner. Be careful not to pull your thread tight - it will gather your hexes. You’ll have to continually loosen the fabric back to a nice flat seam.
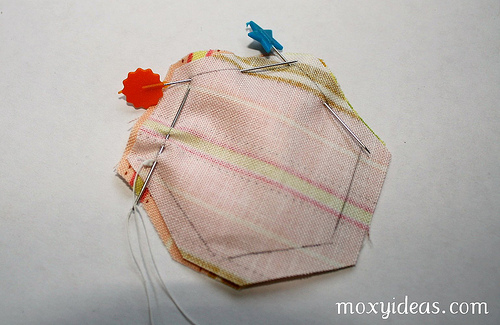
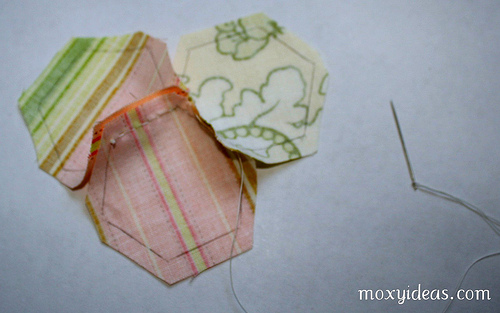
Now you’re ready for a third hexagon. You can add it anywhere, but for this tutorial, I just kept moving to the right. Open your first two hexes and line your third hex up right sides together with your second hex. Use a pin in the corner to keep them lined up.
After a quick back stitch through the second and third hex, to both join them and secure the intersection, continue your running stitch to the next corner.

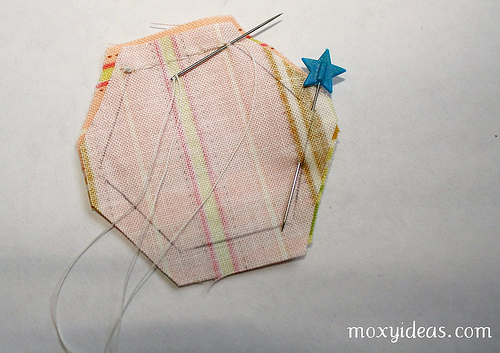
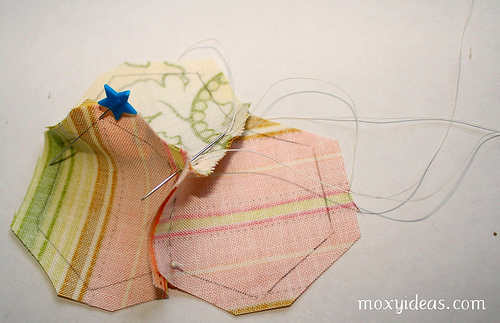
Now you’re at the far right side, and you need to get back to sew hexes one and three together. You can do a back stitch and tie a small knot and cut your thread, or you can do a back stitch and sew a few stitches to run the thread back to the center. I do the latter…it may be laziness, but I try to see how far I can get without ever cutting the thread.
Use the same method of lining up hex one and three, right sides together, and securing the outside corners with a pin. Sew with a running stitch toward your pin.
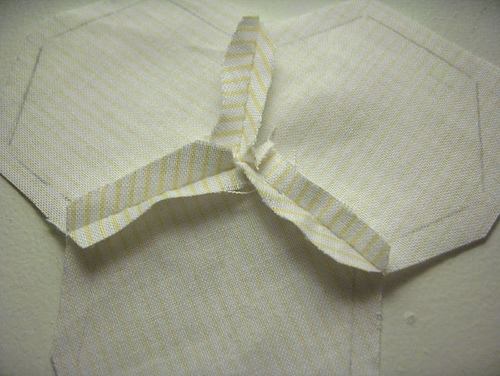
I’ve stopped at three here, but you can just keep adding more and more around, choosing where to place the next one based on where your thread left off. Here’s the back - I’ve finger pressed the seams.
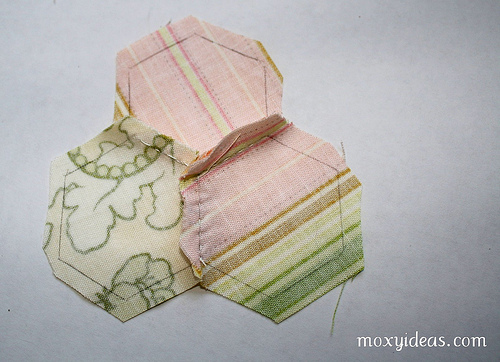
Here’s the front. Once I’ve got all the hexagons I want, I use spray starch to flatten out the seams. Eventually, I’ll also use spray starch to turn the outside edges under, and I applique my hexes down to a foundation. I guess you could just keep going and going until you make a whole quilt, but that is a little ambitious for me.
So that’s it! I hope it helps someone. Sewing these goes super fast - it took ten times as long to write this tutorial as it did to sew those hexes together. I hope you’ll link back to me with pictures of your completed projects!
blabbery flickr quilting sewing: english paper piecing hexagons templates
by Blabby
2 comments
revisiting hexagons
After seeing this super cute picture on flickr and reading her comment about her whip stitches showing, it reminded me that I wanted to revisit the topic of english paper piecing verses simply sewing your hexagons together.
I’ve had hexagon templates available for download on here for a while now. I recently added a couple more sizes. I also added some triangles, but then realized that someone had requested diamonds, not triangles, so I’ll be redoing those :) But the triangles might be fun too - who knows?
ANYWHOO…here’s what I wanted to talk about. After I went through all the trouble (actually, not much trouble at all) of making those templates, printing them, cutting them all out, sewing a bunch into fabric squares using Sunshine Creation’s awesome tutorial, I found that although it was very neat (as in precise, not neat-o), it was too double-the-work for my taste. And when I went to sew together my perfectly neat little hexes with their papers inside, I could not hide the joining stitches, no matter how small my stitch, no matter what thread.
Finally, I ended up just tracing the hexes onto the wrong side of my fabric. I pin them together and and sew along my pencil lines using a running stitch. Super fast and easy. I think I’ll do a tutorial of my own. Maybe tomorrow…with pictures!
The back is a lot messier, but if you use a little Best Press or something, they’ll press right down.
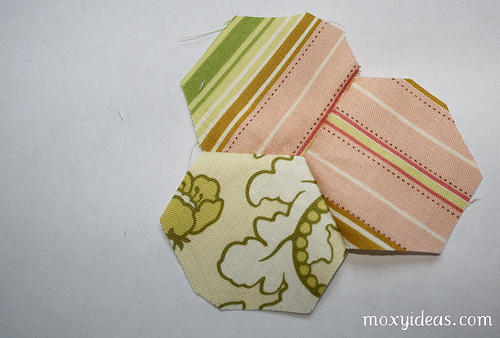
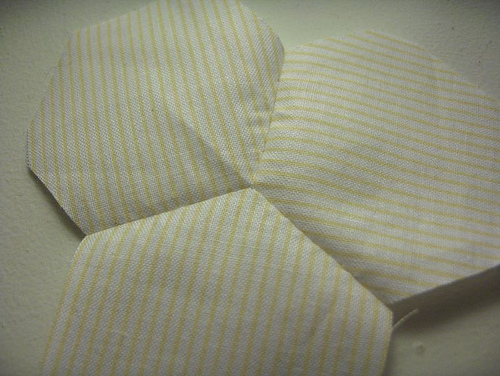
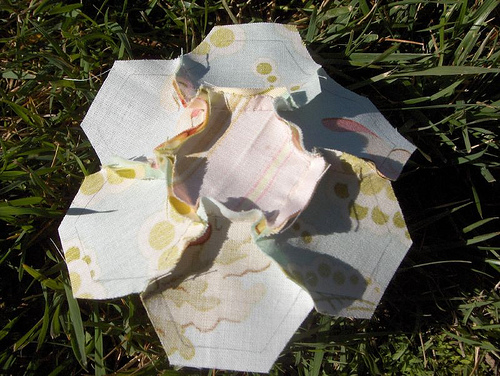
Hexagons are so fun and come out so cute, but the papers inside is so much EXTRA work (to me.) Once it’s all said and done, I don’t think you can tell the difference. The picture at the top has one english paper-pieced flower - you can tell because it’s edges are turned under (bottom right corner). Here it is below and I think you can really see the stitches, which is annoying. The last picture shows the differences in the backs before pressing. But again, I used a little Best Press, and had no trouble getting those seams to lay flat.
Crafts quilting sewing: english paper piecing fabric free spirit freshcut grandma's flower garden hand piecing heather bailey hexagons patchwork quilting quilting patterns sewing
by Blabby
1 comment
more hex progress
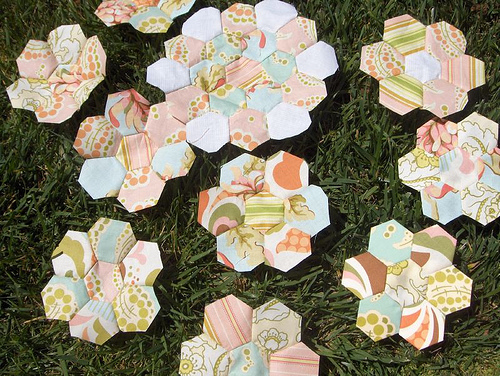
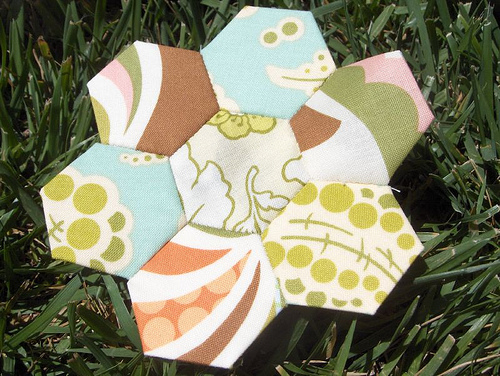
I’ve been plugging away on my hexagons. I started out using the English paper-piecing method, and quickly went to just sewing the hexes together. My process is placing two hexagons right-sides together, and placing a straight pin through the points at one end of a side of the hexagon. Then I start sewing a running stitch at the other end of the line or segment, towards my pin. As I get close, I remove the pin. This has been working great. Here are some photos of my finished hexes. I like the big flower the best, but I’m making a small (24″x 24″) challenge quilt, so I couldn’t use all big flowers.
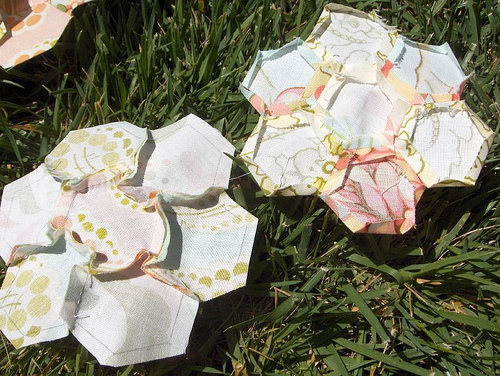
The next photo is one that hasn’t been pressed, and one that was painstakingly pressed with a clover mini-iron. This is the definite downside to not using the paper pieces when sewing hexagons. The seams are a killer.
Here’s the one I did use the paper-piecing method on. It came together pretty easy. Once you get the first round of petals on, take the middle paper out to sew their side seams together. I figured this out half-way through. Duh.
The front of the paper-pieced flower. Much neater than the others, but the stitches are a little too obvious for my taste. And it was TWICE the work - sewing the hexes around the paper, then sewing the hexes to each other. That alone is enough for me not to do it. But I wanted to use up the ones I already sewed the paper into.
All the fabrics except the white with the skinny yellow stripes in the big flower are from Heather Bailey’s Freshcut line from Free Spirit. I LOVE this fabric!
My big plan for this quilt is to appliqué the flowers onto a solid background and add embroidery to one corner. Pictures coming just as soon as I can make it happen :)
Crafts heather bailey quilting sewing: english paper piecing free spirit freshcut hand piecing hand quilting heather bailey hexagons quilting
by Blabby
3 comments
I’ve been hexed
So I’m still plugging away with my hexagons. I posted earlier about the girl that didn’t use paper-piecing - just pieced the hexes together. Well, I tried it, and I have to agree…it’s better. I started with some test fabric…tracing the template onto the back of my hex, pinning the corners, and hand piecing. Then I whip stitched a couple of my paper piece hexes. The end result is that the paper pieced ones look terrible. The stitching is awkward and REALLY shows. I think it has to do with the angle of stitches. Without the paper, I’m hand-piecing in line with the seam line. With the paper in there, I’m stitching perpendicular to the seam line. Make sense? Here are some visual aids…
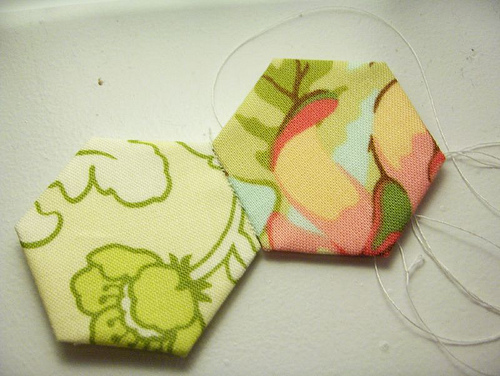
The main problem I found with the no-paper system is that now I have to plan out my design before I sew. So, I’ve started making flowers. Here’s my first one…
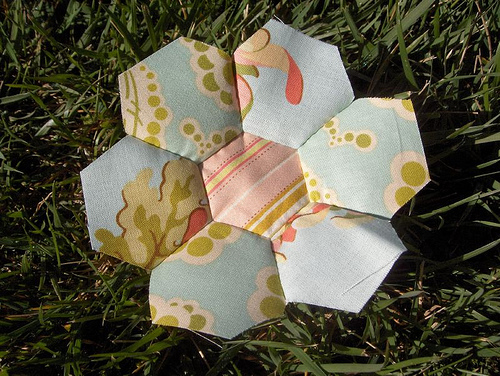
I have no doubt that using the papers is more precise, but it’s also twice the work…we’ll see how it all works out. So far, I like my flower. If you need hexagon templates, you can download them from my download page above!
Crafts quilting sewing: english paper piecing grandma's garden quilt hexagons quilting tutorial sewing sewing tutorial
by Blabby
2 comments
more hexes
Look at this great post - she’s making hexagons, but she cut out the paper-piecing step! Sounds good, actually. I like the idea of half the work!
Crafts crochet denyse schmidt heather bailey quilting sewing: denyse schmidt embroidery english paper piecing heather bailey hexagons hook roll last minute patchwork + quilted gifts modern quilts quilt patterns quilting sewing
by Blabby
5 comments
new crafts…
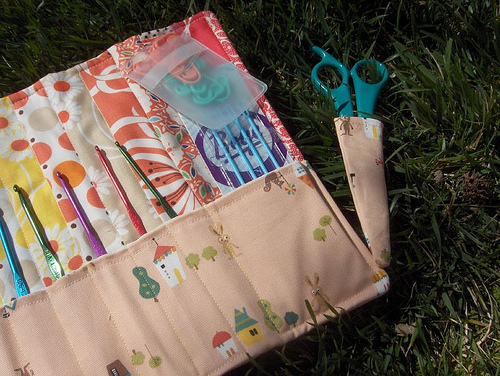
Here are my latest creations and almost creations. I made this cool hook roll using a bunch of Denyse Schmidt fabrics and my special pink Japanese bunny and squirrel fabric. I think it came out great. The pattern is from Last Minute Patchwork + Quilted Gifts, and although it looked pretty intimidating with all of those strips, it was very fast and easy.
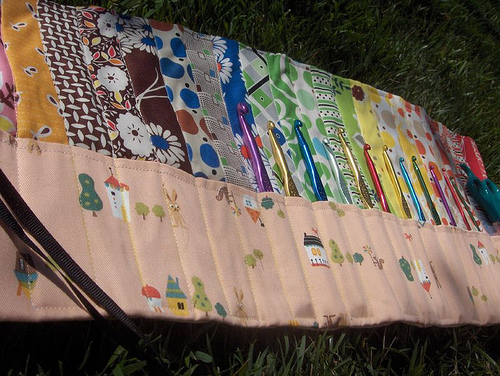
Plus, I loved using all those fabrics at once. I am really bad about collecting fabric and then not using it because I hate to cut it, and I hate the idea of not having it anymore. Isn’t that silly? What good is a fat quarter sitting in a box? Isn’t it much better cut into pieces and sewn into something cool? I can see the rationalilty of this right now, but when it comes to my next project, I’m sure I’ll have trouble selecting the fabric I’m willing to cut.
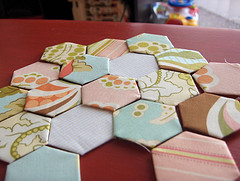 I’m also slowly working my way through a million hexagons. I don’t know how many I’ll make, but I cut about 400 squares from five different fabrics. And I’m using my handy hexagon templates (available for download!) which are working perfectly. I can’t decide if I want to just sew them into a big mix, or if I want to create a pattern with them. I saw a fun quilt in a book called Modern Primitive Quilts where the hexagons were appliqued around embroidered blocks - I loved that idea. Especially with fun embroidery patterns out there like Wee Wonderfuls stichettes. In fact, I think Heather Bailey’s fabrics would be the perfect frame for my Quilting Bee embroidery.