addictions Crafts family flickr sewing: 2 year olds bags box bag box bag pattern craft blogs dopp kit flickr kid language sewing sewing tutorial toddler tutorial
by Blabby
leave a comment
More great tutorials!
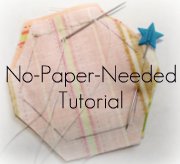
Seriously, there just isn’t enough time in the day to sew all the things I want to sew. I’ve been admiring these box bags (which my husband calls dopp kits) by splityarn for some time, but couldn’t wrap my mind around the ends. Then I found this AWESOME tutorial by drago[knit]fly. THANK YOU!
In other news, my adorable kid has made up his own language. In the car today, he’d say “what’s red?” and I’d say “roja”…we were working on Spanish. Then he says, “what’s mooshkin?” and then he cracks up. He’s got a whole list of such words. Here are a few: mooshkin, monkshin, bosh, spoosh, bonkshin, maupshin, maups, faumps…I’m guessing on the spelling here. I really think only bosh and spoosh have meanings - which is basically when he does a power ranger move on something. All the rest are purely for silliness sake. I happen to love those words. They make my monkshin faumps!
Crafts fabric featured music quilting sewing: applique applique patterns compai concert t-shirt Crafts craftster deconstruction diy Indigo Girls inspiration sewing susan prioleau tshirt surgery tutorial
by Blabby
2 comments
Applique and t-shirt surgery
BettyNinja left me a nice comment saying I should write a tutorial for my appliqué aprons. Betty, I’m afraid the only tutorial I’m qualified to write is to say that I think everyone should take an appliqué class at a local quilt shop. I took one class, and the teacher (Susan Prioleau) taught a great technique and answered all my questions. Now I feel like I can follow any pattern, and I’m even working on my own designs. I seem to see appliqué everywhere.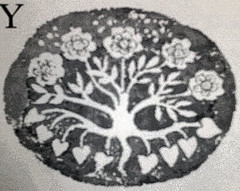
I was in a used book store the other day, and I saw this great book of stories with all these fun medieval illustrations. Here’s one - I think it would be a very cool appliqué design.
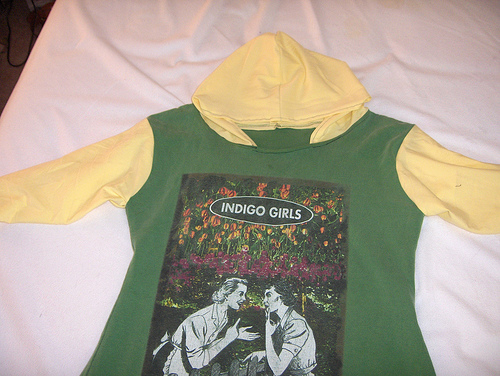
My other current love is t-shirt surgery. Indigo Girls are headed to Humphrey’s in San Diego next week, and I really wanted to wear one of my old concert t-shirts, but they’re all awful. They’re huge men’s shirts that look terrible. So, I took my favorite one (sorry for the inappropriate picture on the front), resized it, added better sleeves and a hood! It’s not perfect, but it fits great, and it’s much better than it was before. I read a lot of tutorials on craftster and on other blogs before I got started, but it was pretty straight forward.
(Pictures after the jump)
Step one: lay a shirt that fits you on top of one that doesn’t. Trace around it. Pin the shirt and cut away the excess.
Step two: cut out your pieces - sleeves, hood, extra pockets, whatever you’re adding.
Step three: sew your extra pieces (close up the sleeves, hem the hood).
Step four: attach new pieces to your old shirt.
Step five: sew up sides of your old shirt.
There was a lot of debate about the best stitch to use on stretchy fabric if you don’t have a serger. I just used a straight stitch to join things, and then topstitched the seams open with a straight stitch using a twin needle. It worked great, and allowed me to add in some contrasting thread. Let me know if you have questions.
for pictures, click here… more »